Interest
Figure Build Close-Up: 2014 Master Grade Build Gundam Mark II
posted on by Lauren Orsini
Once you've built a few High Grade models, Bandai's most varied but basic grade of kit, you may be looking for a bigger challenge—and a bigger payoff at the end.
That's exactly what I got when I built the 2014 Master Grade Build Gundam Mark II. This is not a groundbreaking Gunpla design. In fact, it's almost exactly the same kit as the 2005 Master Grade Gundam Mark II, except with a new V-Fin and “Build Booster” backpack.
It may not be a new model, but it was certainly new to me. This timeless Gundam Zeta design and a veritable arsenal of handheld weapons gave this Master Grade a lot for me to love.
Normally, I build a High Grade Gunpla in one afternoon. However, this Master Grade took me about ten hours of work. There are a few components that go into making a Master Grade so much more of a time commitment.
First, there's the size. This kit is 1/100 the size a real Gundam would be. While there's some variation, the majority of modern High Grades are 1/144.
Next, there's the complexity. Master Grades are more poseable in part because of their internal skeleton. So there's a lot of parts to build that you don't even see in the finished build!
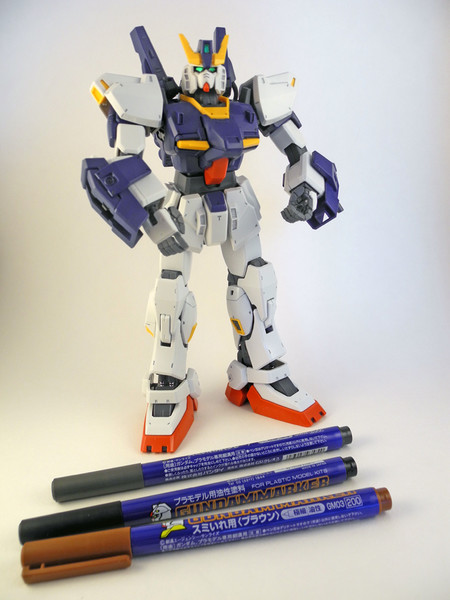
Here's a great example of the detail that you get in a Master Grade—a fully articulated hand. Usually, High Grade Gunpla come with multiple hands in different poses, so you can switch them out in order to make the Gunpla pose with different weapons. Here, one hand is all it takes for every weapon—just wrap the fingers around it to make it fit.
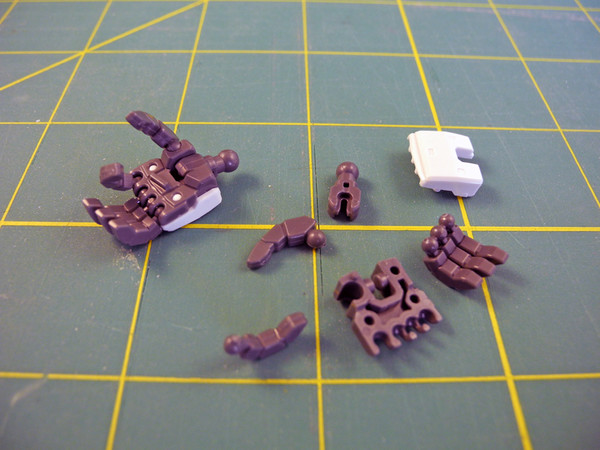
On the left, you can see an assembled hand. On the right—all the pieces that go into it!
It wasn't just cutting out all these additional parts that made my Master Grade build take so long. It was also making sure those parts were perfectly smooth. In order for the kit to be as posable as possible, I needed to make sure everything fit together perfectly, and that meant doing a lot of sanding. It wasn't enough to cut pieces out with nippers or use an X-acto knife.
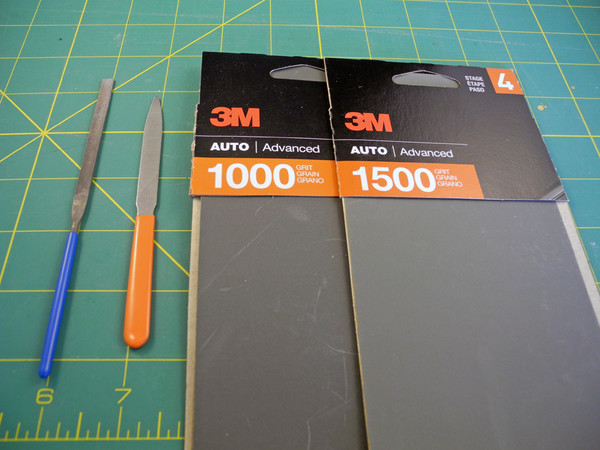
I alternated between three tools. First, a file. Similar to a metal nail file, this is the coarsest way to sand, and is best for a bigger nub. Next, I would switch to 1000 auto sandpaper. Finally, I'd clean up with the lowest grit 1500 for the tiniest ridges. The higher the number on your sandpaper, the more refined and better for detail work it is.
Of course, that left me with some serious scuff-marks, like you can see here. Since this is a Master Grade I want the finished product to look as perfect as possible, so more later on how I'm going to get rid of that eyesore.
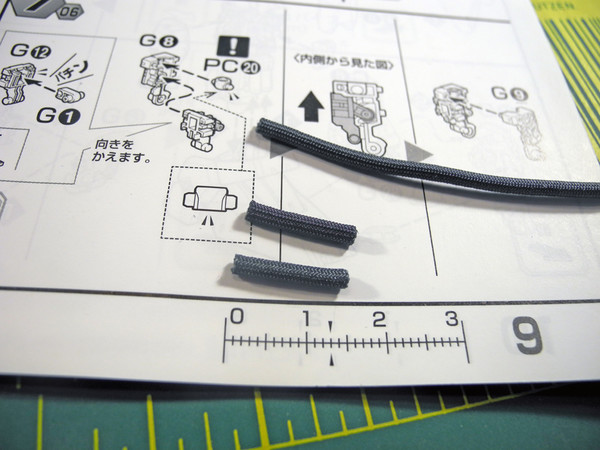
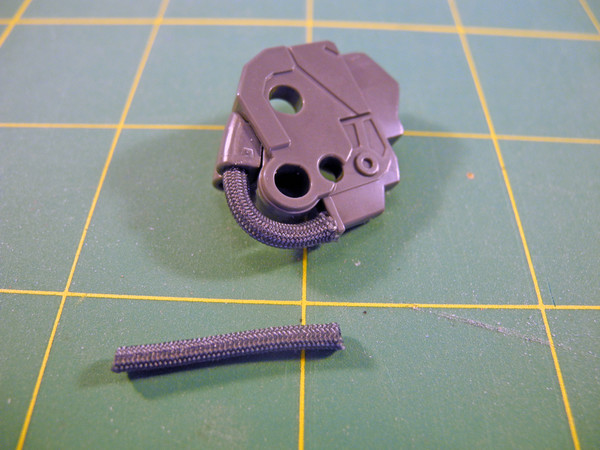
There were a few other peculiarities to this kit. First, some instructions would call for “mesh pipe,” which turned out to be this fabric tube that came with the kit. I would need to look at the ruler on some pages of the instruction booklet, cut it into pieces, and attach them to the kit.
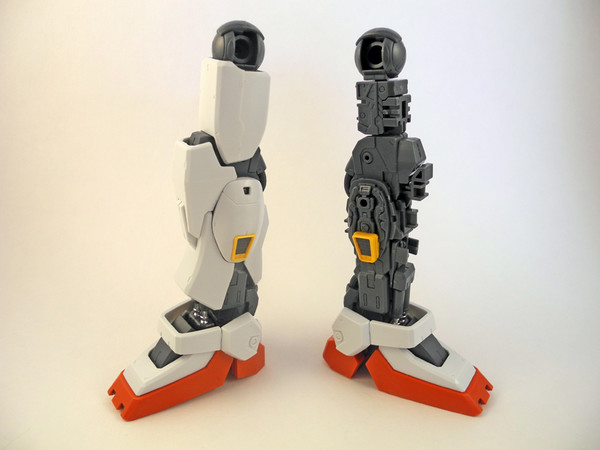
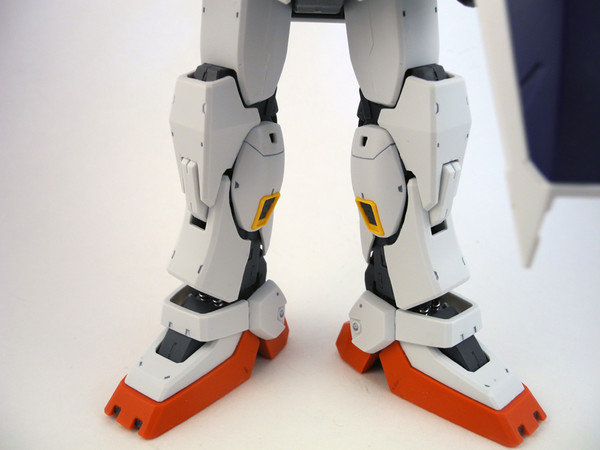
The pieces in these photos are visible at the back of the legs when the model is viewed from behind.
Next, there were some metallic silver pieces. They're plastic, of course, but they are very eye-catching. They're only located on the foot, but when you know to look for them, they gleam in every pose.

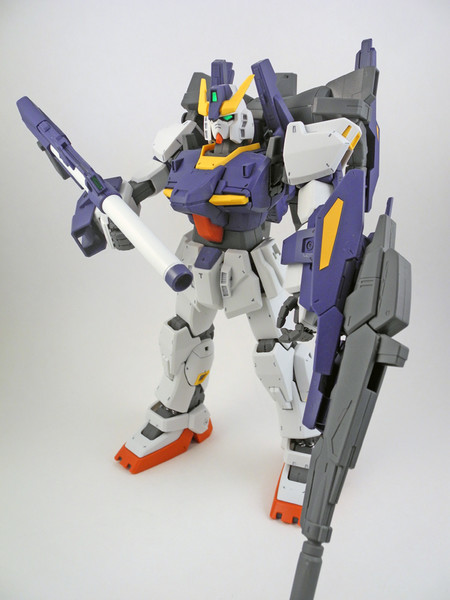
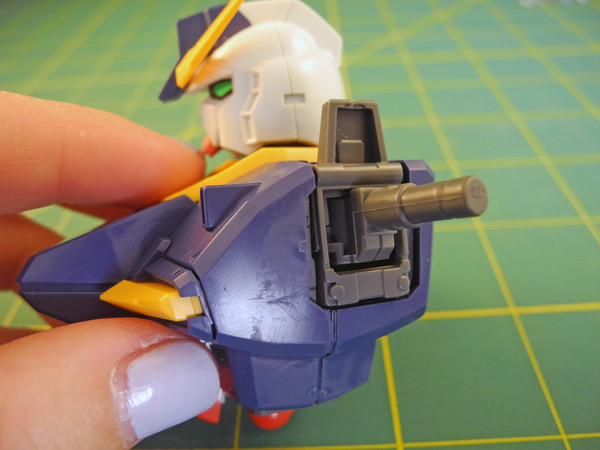
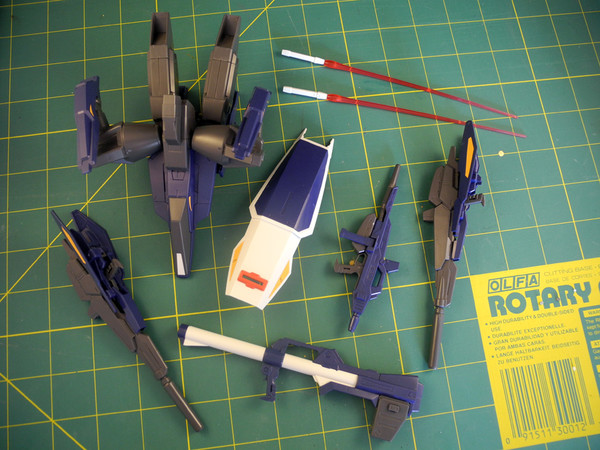
After I finished assembling the body of the mobile suit, I was only half done with the build. Check out the arsenal of weapons that also came with Build Mark II! The largest piece here is the Build Booster, which can also be attached as a backpack.
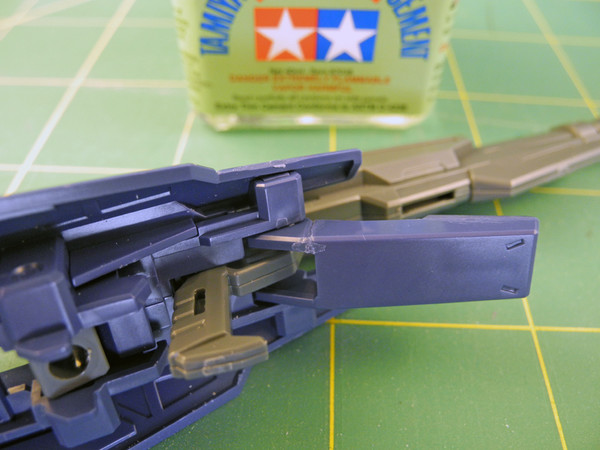
I wanted to highlight a mistake I made while working on one of the guns. I was a little too rough with a delicate piece, and ended up snapping it in half. Luckily, I have Tamiya Cement for situations like this. I used the brush tip to apply a small amount (really, I applied more than I needed to here—it requires very little), and waited 10 minutes for it to dry.
After everything was assembled, sanded, and in one case, glued back together, it was time to check out my work. Here's the body of the Build Gundam Mark II put together for the first time.
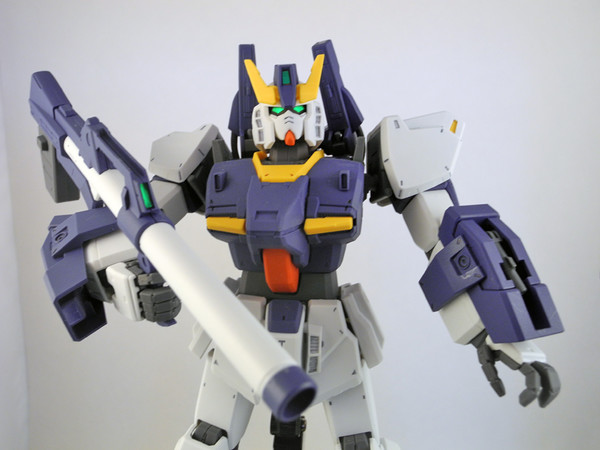
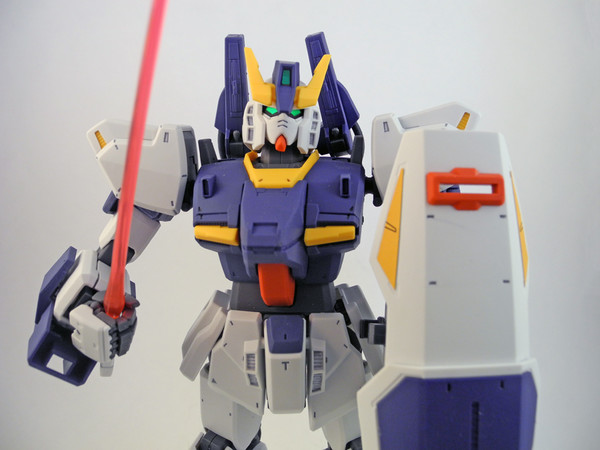
But it's still missing some detail, don't you think? So after this, I panel-lined the visible parts, by which I mean I colored in the details on the plastic with a marker, and then softened with a Q-Tip, to give it some definition. To avoid too much contrast, I used a grey marker on white parts, a black marker on navy parts, and a brown marker on yellow and red parts.
It's hard to tell in this photo because I used a light box, but this kit is still scuffed to bits. All that sanding made parts of it look dull, and it's an ugly contrast with the plastic's shine. So I took the kit apart once again, stuck it on bamboo skewers with alligator clips…
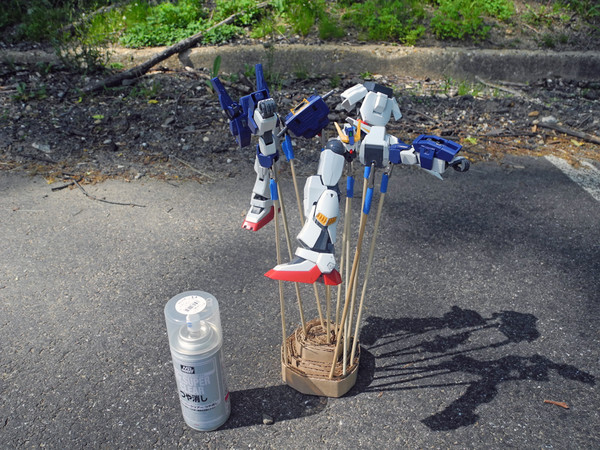
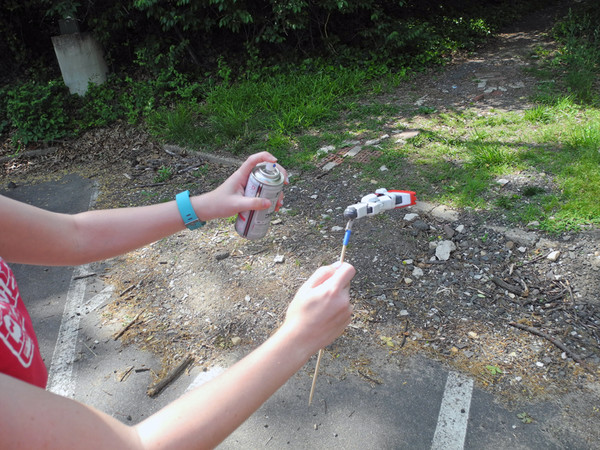
… And sprayed it with a matte top coat. Notice I am holding the spray can about 6 inches away from the piece. And you can't tell in the photo, but I am standing in the direction the wind is blowing. I always spray top coat outside to avoid fumes.
Now the kit is completely matte, or totally unreflective. That means the sandpaper scuffs are all but invisible. I also like the way matte kits look because they're not shiny like toys.
When applying the matte coat, I did not remove the stickers or the reflective foot pieces, though some builders would. For stickers, I think there's still enough of a shine that I don't bother, plus the matte top coat helps seal the stickers in so they don't become unsticky later. For the shiny plastic, I just bent the leg forward so I wouldn't spray them.
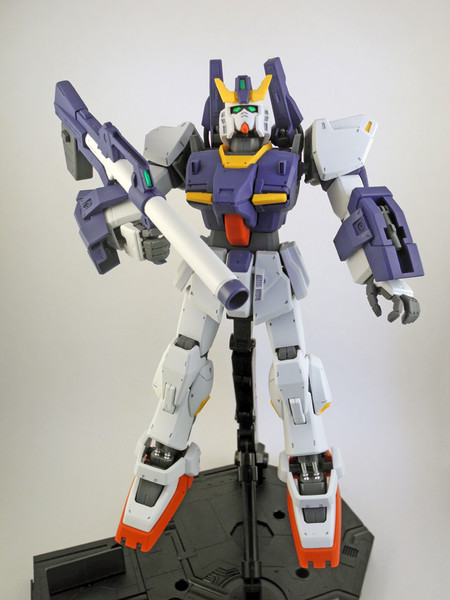
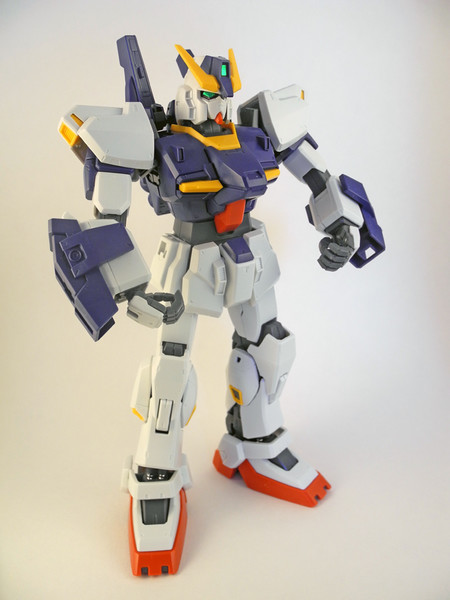
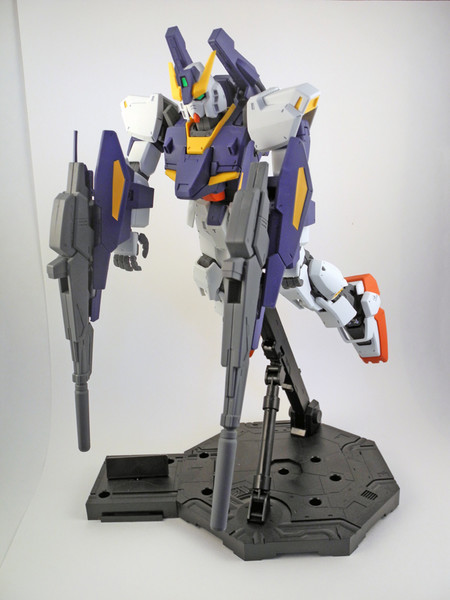
Since 1/100 is a standard scale, I was able to pose this kit with a stand I already had on hand. This kit lends itself to a lot of aerial poses. You can really see the contrast here between the top-coated kit and the shiny, untreated stand, too!
If you are considering your first Master Grade and you've already built some High Grade kits before, get ready for a more time-consuming Gunpla project than usual. That said, the size, details, and peculiarities of your Master Grade will be an amazing reward for your effort!