Epic Threads
Propmaking with Cardboard
by Devin Harrigan,

|


About this month's featured cosplayer
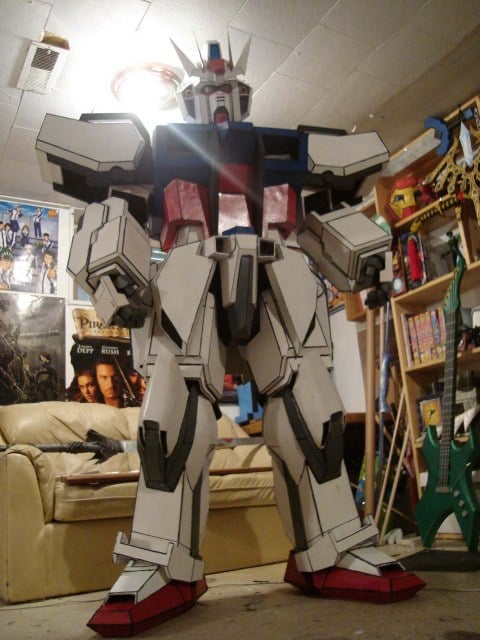
Devin Harrigan, AKA Featherweight, has been making props for almost two years. He's a member of cosplay.com and is best known in the community for making detailed props entirely out of cardboard.
The process
The first thing and most important thing you'll need to do is plan. Planning is everything. Pick out what you want to cosplay as far in advance as possible. That way, you can take your time gathering all the supplies you'll need, and you'll be able to work out any problems you may encounter. Once you know what you want to build, you'll need to get reference pictures.
To me, reference pictures are my Gods. Without good reference pictures, you'll never be able to make the perfect prop. Hit up Google, forums, and wherever else you think you can get as many different pictures of what you're building as possible. Then, study them and learn every curve and detail until you can draw it in your sleep. Next, you need to figure out the scale to which you need to build your prop. If you're small, shrink it. If you're big, build it larger. It should always be proportional to the cosplayer, regardless of what size it is in the anime or manga.
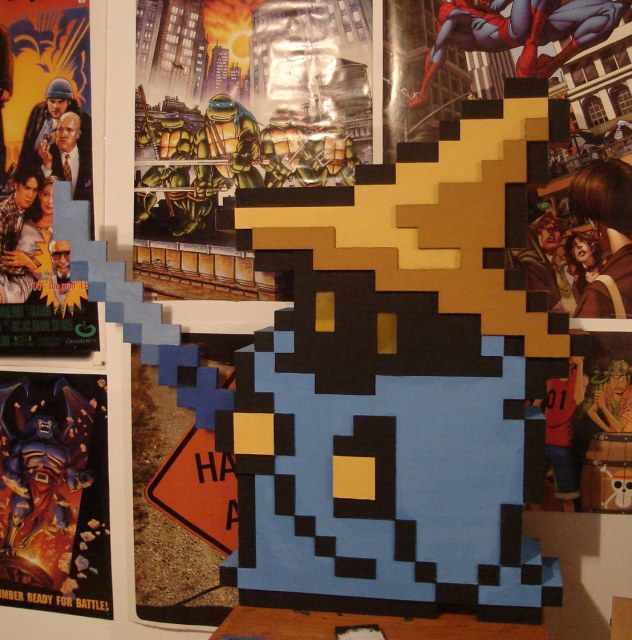
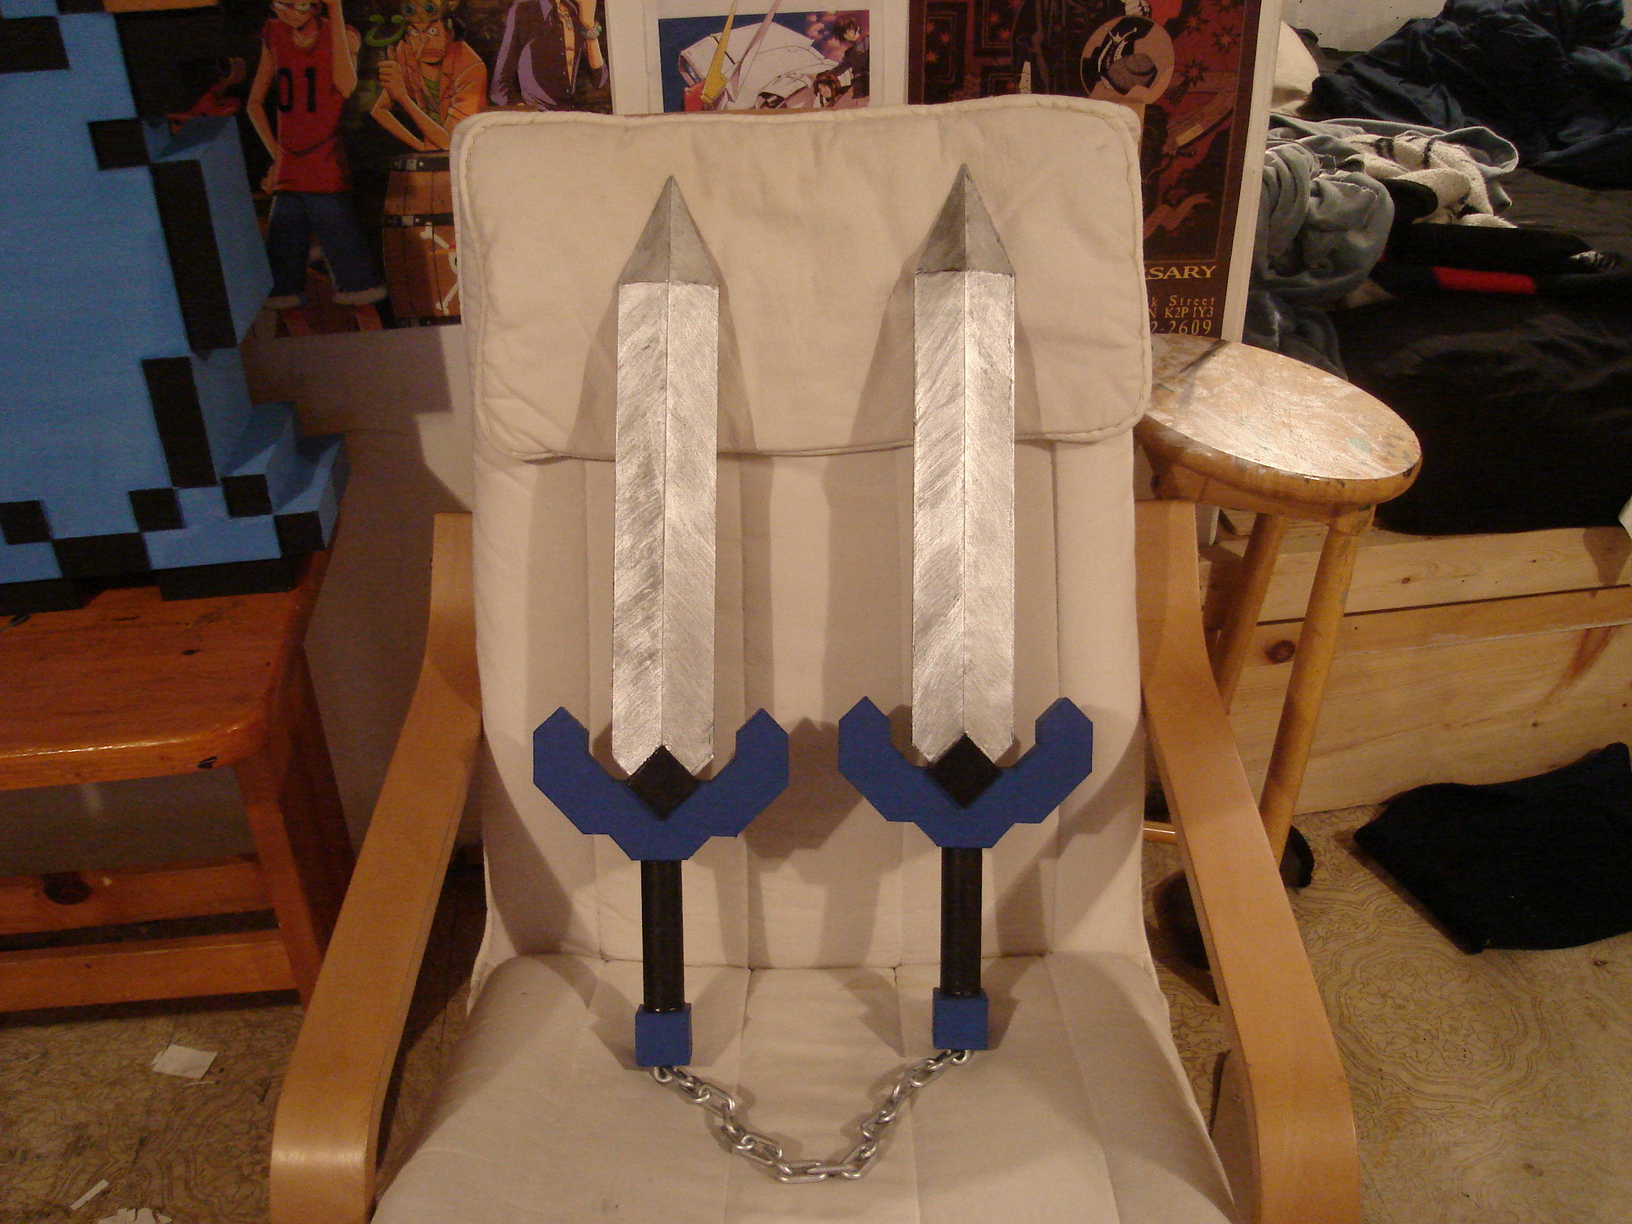
Once you know what you're building and how big it's going to be, it's time to gather materials. Personally, I use cardboard, hot glue, and whatever else I can get my hands on. Why cardboard and hot glue? Truthfully, if you can't find cardboard for free, then you aren't trying very hard! Plus, hot glue is extremely cheap. The amount I use is relative to the size and type of prop I make—some only take one stick, and some take several hundred, but when you think about it, it's only about $20 worth of glue. For details, I like to use comic backs and poster board, because they're thin, flexible, and are readily available. Honestly, it's not really that important what materials you use. Just work with whatever's available and what you feel most comfortable with. Quality is about the time and care you put into your work—not about what you build with.
Now that you know what you're building with, start building!. Don't be afraid if it's a big or complex project and you don't know how you're going to do it. Just start working! The best way to learn is by doing, so just get cracking on it. You'll be able to work things out as you go; don't be afraid to make mistakes! If you mess up, just try again and again. Keep working at it until you're happy with what you have. This page has a few links to tutorials for building swords and other props, but honestly, the best way to figure out how to build something is to just get your hands dirty and do it.
Once your prop is built, it's time to paint! Never underestimate the important of a good paint job. It can hide flaws and show off details—it's what will bring your props to life. Try shading, layering colors, dry brushing, and even using markers to outline details. Everything can be a useful tool, as long as you're creative enough. It's a good idea to prime the prop before applying the final paint job. That means first painting the piece either solid black for darker props, or solid white for the lighter ones. It definitely helps the final product look much more even in the end. Personally, I've always liked to use acrylic craft paints, the ones that come in the little bottles. Some people will tell you that certain brands are better than other ones, but I've just always used whatever is on sale, and it's always worked out pretty well for me. When it comes to metallic paint, I've found that Plaid's FolkArt brand works rather well, but there's no one certain brand that I'll always use for all my paint jobs. If a prop calls for a clear coat finish, I'll paint varnish over it, but it depends on what kind of look I'm going for.
In the end, the most important thing is to relax and have fun. Making props can be hard work sometimes, but as long as you're having fun doing it, that's all that matters.
Tips
- The hardest parts about working with cardboard are making complex curves, smooth surfaces, and intricate detail. When it comes to doing curves, I like to build the curved shape with cardboard, then coat it with hot glue or another smoothing agent to round it out. For complex curves, I'll coat the surface with hot glue, but for simple curves, I'll usually skin it with comic backs or poster board. It helps give the product a smooth, finished look.
- For details, I always like to use hot glue and comic backs, because the flexibility and versatility of both give you more leeway in what you can do.
- When it comes to big props, be careful about the structural integrity. If the thickness of the prop doesn't naturally support itself, I usually reinforce it with wooden dowels.
Tutorials Trench Knives Keyblade (Kingdom Key)
discuss this in the forum (14 posts) |