Epic Threads
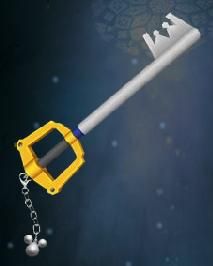
Tutorial: Keyblade (Kingdom Key)
by Devin Harrigan,
|
Since this is a tutorial for a specific keyblade, and not just a general guide to a certain style of building, I'll try to be a little more precise in the way I lay things out. When complete, this particular keyblade should be scaled to an average-sized man and has a finished length of 42 inches, but remember to rescale everything to your height.
Materials
Tools
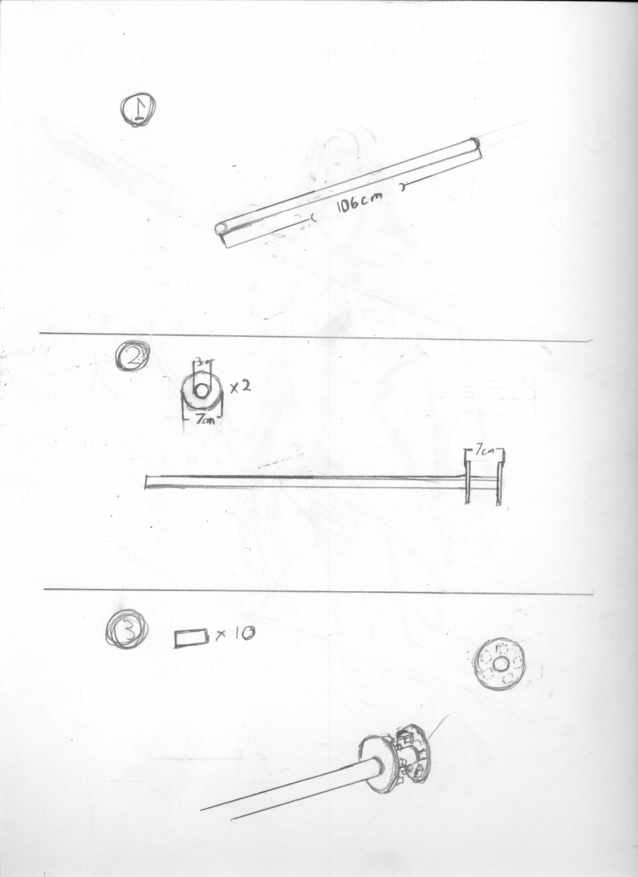
1) Cut the dowel to a length of 106cm.
2) Cut two circles that are 7cm wide and have a 3cm hole in the center. Glue them on the dowel so they are 7cm apart measured from the outer edges of the board.
3) Cut out ten cardborad tabs. Bend them, then glue them evenly spaced around the inside of the two circles. They should be .7cm from the edges.
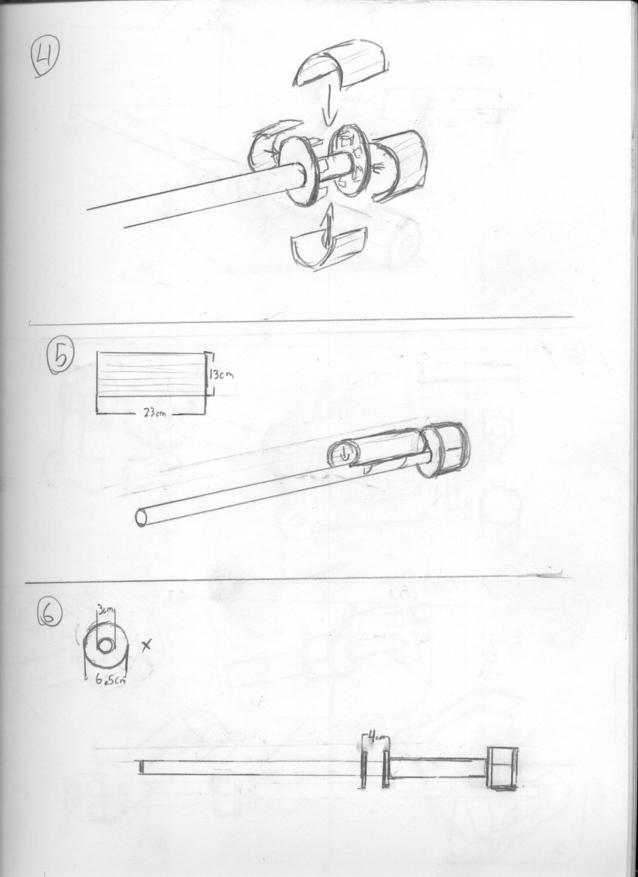
4) Cut pieces to fit between the two circles and glue to them to the tabs. Add an additional layer over that.
5) Cut a 13cm x 23cm piece and glue it around the dowel starting from the base of th second circle. Fill the crack with glue.
6) Cut two circles the are 6.5cm in diameter, with a 3cm hole in the middle. Glue them on the dowel starting at the base of the handle piece and space them 4cm apart, measuring from the outer edges of the board.
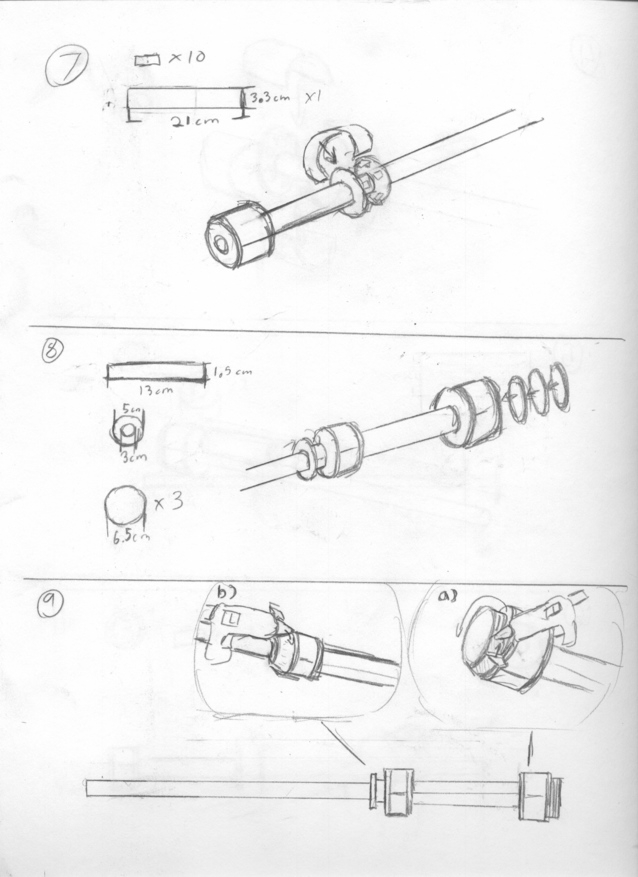
7) Cut ten more tabs and a 3.3cm x 21cm piece. Glue the tabs .4cm from the edges of the circles, then wrap the other piece around and attach it to the tabs with glue.
8) Cut a 1.5cm x 13cm piece,a circle 5cm in diameter with a 3cm hole, and three circles 6.5cm wide. Wrap and glue the rectangular strip around the dowel at the base of the handle, then glue the 5cm circle to the strip. Afterwards, glue the three 6.5cm pieces to the back of the handle in the center.
9) Using glue, fill the edges at both the front and the back of the handle as seen in [A] and use the tip of the glue gun to smooth them out as seen in [B].
10) Cut four 15cm x 36cm pieces, then glue comic backs over them. (Note: most comic backs have a glossy side; you'll want to glue that side face down to make painting easier.)
11) Use this as a general guide. Draw the shape so that the handle is 34.5cm long. Cut it out and use it as a template to cut out the four handles. Remember, there should be two left sides and two right sides so that the side lined with comic backs will be on the surface of the handle (note: don't forget to cut out the holes). Then cut away the inner edges of the two ends of the handle pieces at a 45 degree angle. Be careful not to cut the comic backs when doing this.
12) Cut eight sqaures and glue them under the round edges of the handle pieces as seen in [A]. Make sure the square covers the hole. Cut away the extra so that they match the shape of the handle as seen in [B], then fill in the inner edges of the hole with glue [C].
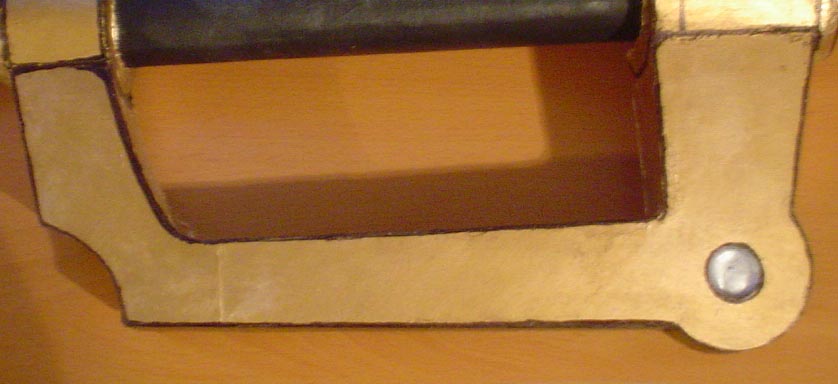
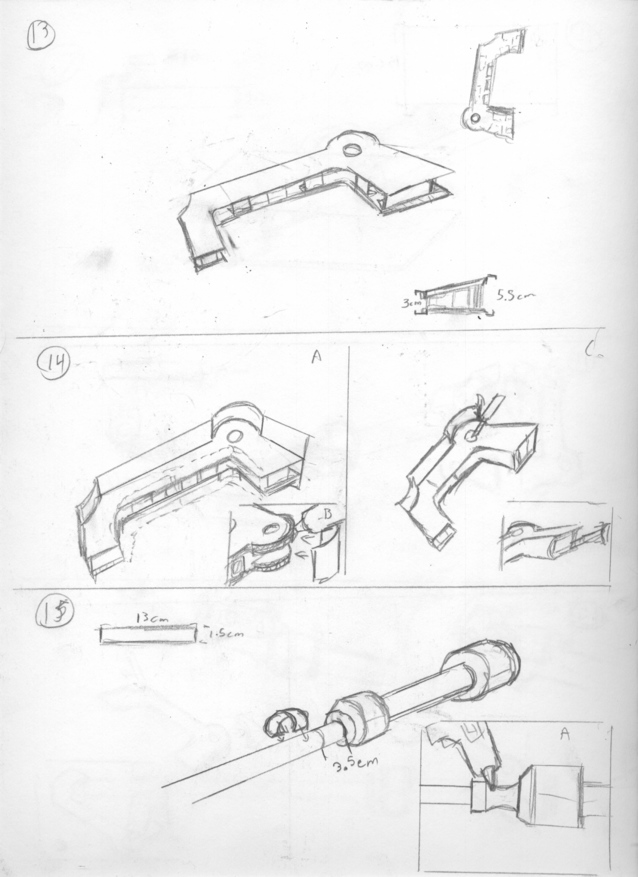
13) Cut several tabs and put together the pieces of the handle. The tabs should come to the very edges of the pieces except the two ends, where the tabs should be moved in a bit over 1cm. The pieces should be put together so that the handle is 5.5cm tall on the inner side and 3cm on the outer side.
14) Bend and glue comic backs to the edges of the handles except for the two ends. Attach them by putting glue on the edges and tabs, then putting the comic backs on as seen in [B]. Cut away the extra comic backing as seen in [C]. Cut the sides of the edges so they are round and will fit onto the rest of the handle.
15) Cut a 13cm x 1.5cm strip and glue it to the dowel 3.5cm away from the handle. Fill the outer edge with glue, then put glue along the inner space between the strip and the handle. Smooth the edge with the tip of the gun as seen in [A]. Note: the way the gap is filled and the fact that it's a dark blue gives the illusion of it being smaller than the rest of the dowel.
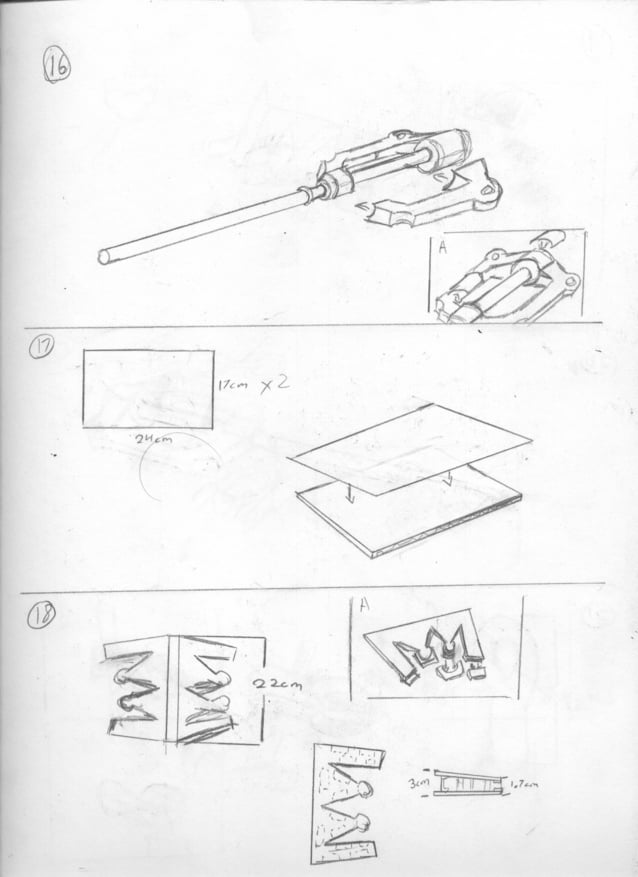
16) Glue the handles to the cylinders. Then cut squares of comic back and glue them over any parts of the cylinder that you can still see [A].
17) Cut two pieces 17cm x 24cm, then cover it with a comic back.
18) Using this as a general guideline, draw out a template so that the blade is 22cm wide. Cut out a left and right side of the blade. Then glue pieces on the underside of the blades and cut away the extra, as seen in [A]. Make tabs and then put the two sides together the same way you did the handle in step 13. This time, make the inner edge 3cm tall and the outer 1.7cm.
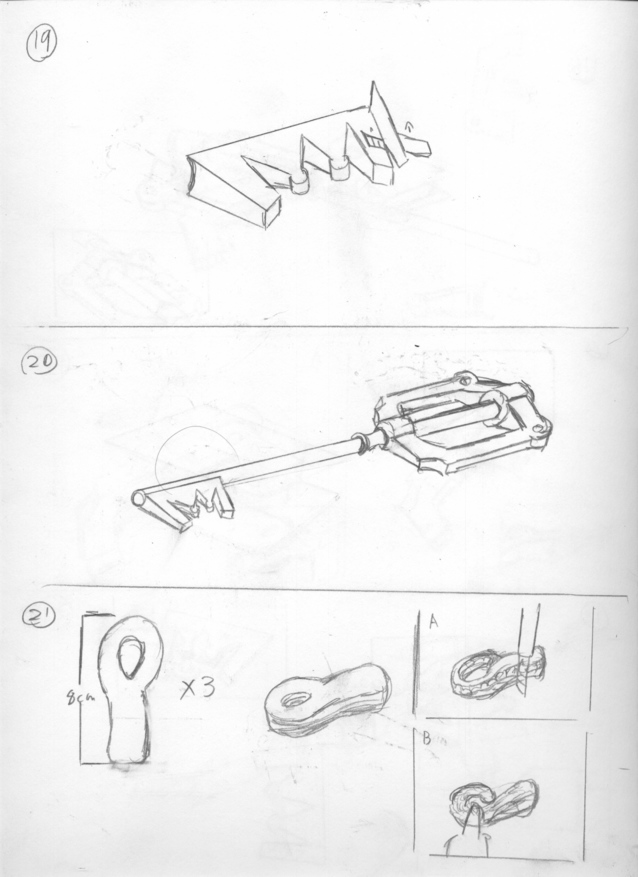
19) Glue on comic backs and cut away extra pieces the same way you did in Step 14.
20) Glue the blade onto the end of the dowel, making sure to keep it level with the handle.
21) Cut three pieces of the shape shown out of cardboard and glue them together. Carve away the edges so that they are rounded, as seen in [A]. Fill the cracks with glue, than smooth with the gun [B]. When done, you should get something that resembles a hook.
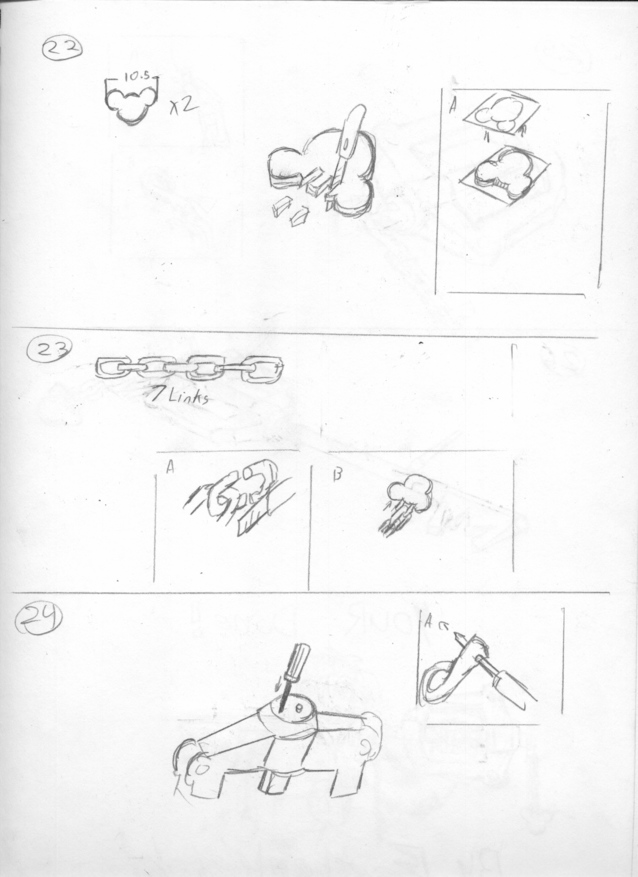
22) Draw a Mickey shape so that it's roughly 10.5cm wide. Cut it out and use it as a template to cut two Mickies out of cardboard. Then cut two slots out of them between the ears about 1.5cm deep. Glue comic backs to both sides and again cut out the Micky shape.
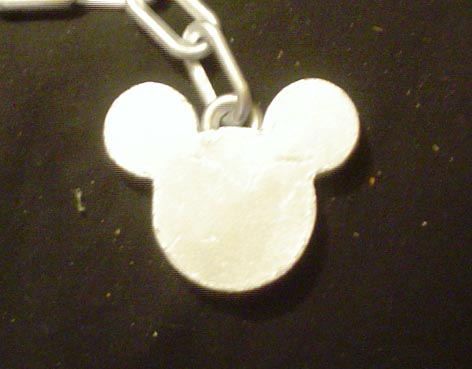
23) Take seven links of plastic chain. Cut the last link in the chain in half as seen in [A]; save the other half for step 25. Glue the chain into the slots of Micky [B].
24) Take a screwdriver and poke two holes in the back of the blade that are the same width apart as the chain. Than poke a hole in the bottom of the connector link as seen in [A].
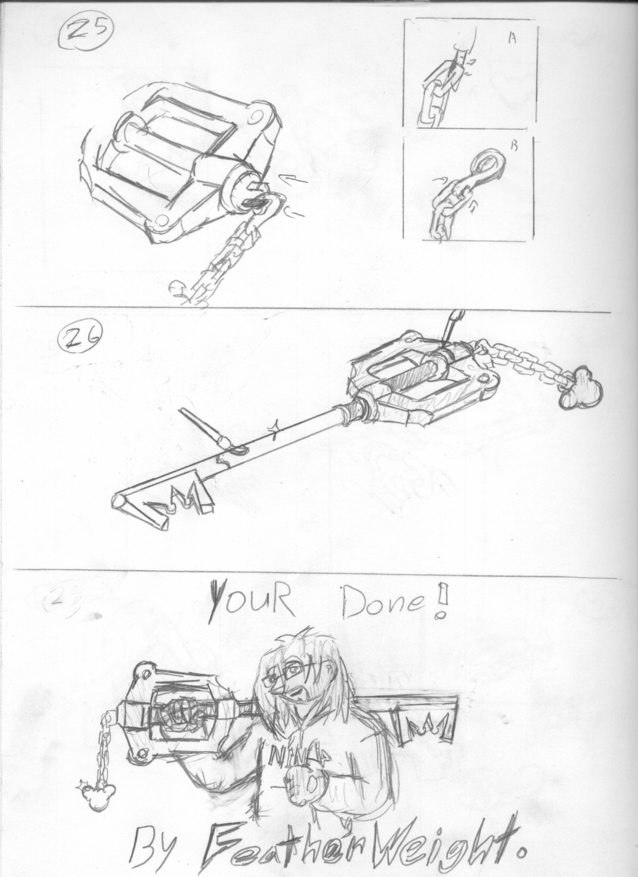
25) Take the free end of the chain and cut through the end of the link as seen in [A]. Then pull it open and put it into the hole poked in the connector link. Then using the other half of the chain link left over from step 23, hook on the connector link and glue the chain link to the hole in the back of the handle.
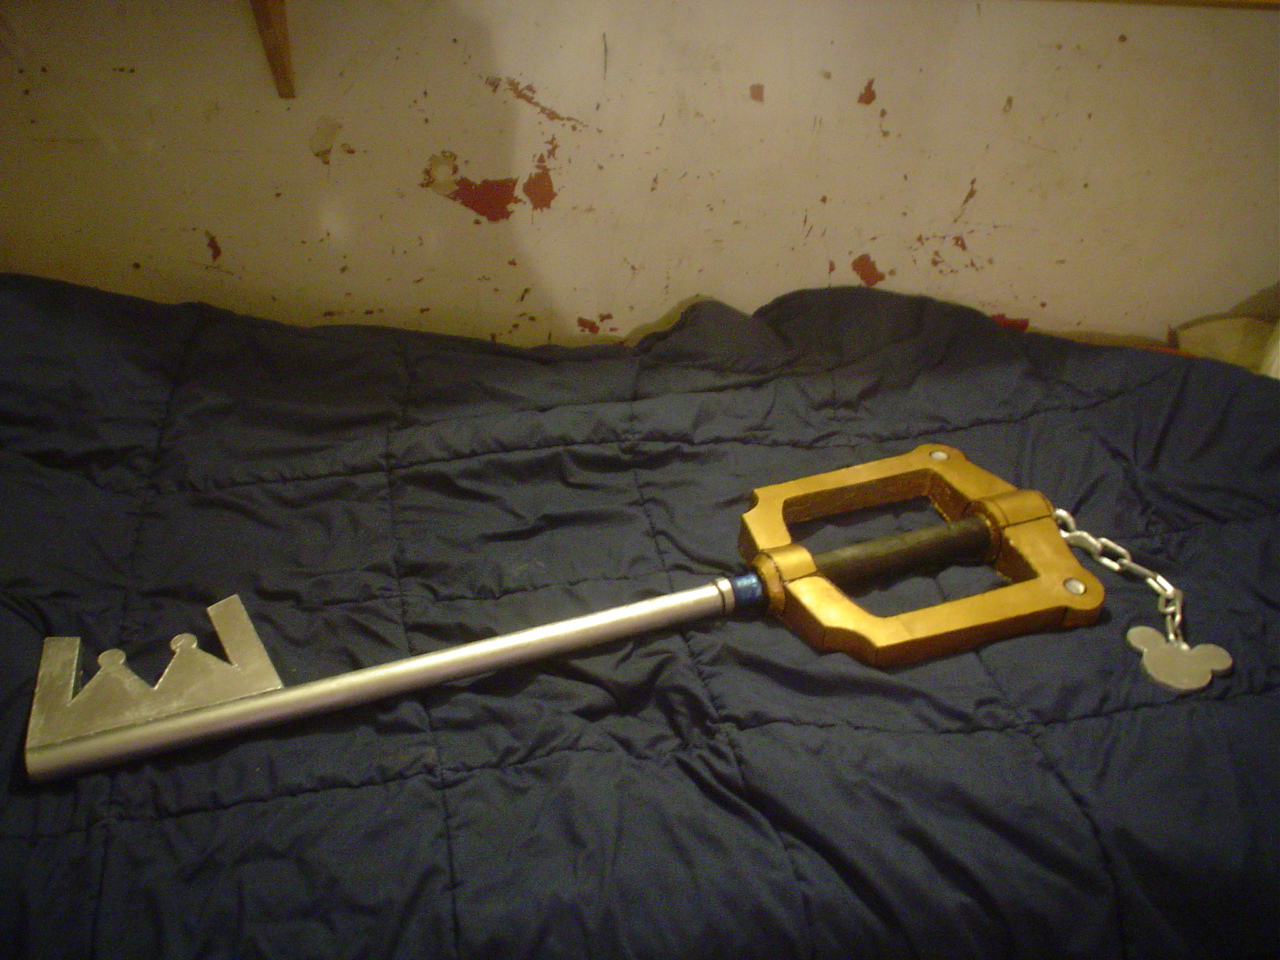
26) Paint and detail the key.
discuss this in the forum (14 posts) |
back to Epic Threads - Propmaking with Cardboard
Epic Threads homepage / archives